 |
| (Click to enlarge) |
It. Turned. Out. Beautifully!!! And it was super easy, so I can't wait to share it with you!
Our half bathroom downstairs should really be considered a fourth of a bathroom. Or a seventeenth of a bathroom. We're talking ti-ny. So I wanted to do something to add a little pizzazz and color without making the space look any smaller... And I've really been wanting to paint large navy stripes somewhere to fulfill my love for all things nautical. Simply put, I think it just looks wonderful. :)
What you'll need to begin are your two paint colors of choice, a small paint brush and / or roller (depending on the size of your stripes), and tape.
Now you might be able to get away with any type of painter's tape due to the nature of this method, but the one thing I always splurge on is FrogTape. It's $3-4 dollars more than the next step down, but in my opinion, $3 is definitely worth the price difference in the long run. And I'm the cheapest girl you'll meet. :)
Step 1: Paint the wall your base color, with however many coats you need to cover well.
Step 2: Measure out and tape where you'd like your stripes to go. Press hard and well on the tape to prevent leaks.
 |
| (Click to enlarge) |
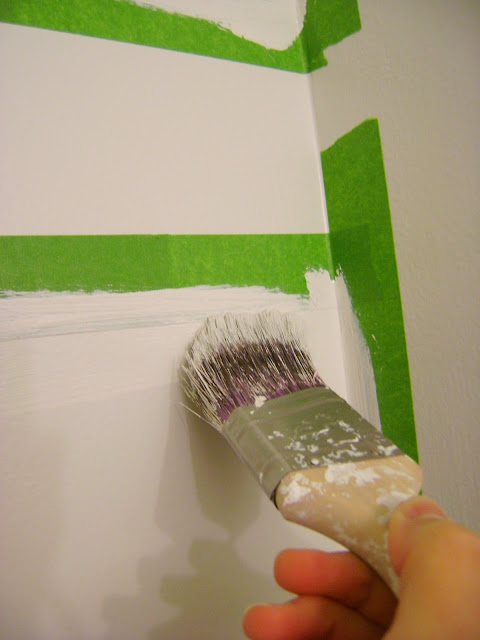
Step 3: Paint over the tape, where the stripe begins, with a coat of the base color.
Yes, the color the wall is already painted. Why? Because if anything leaks, it will leak on the first coat. And this way, it will completely blend in with the color on the wall. Invisible leaks!
 |
| (Click to enlarge) |
 |
| (Click to enlarge) |
Step 4: Wait for that to dry.....
Step 5: ....Then back to painting!
 |
| (Click to enlarge) |
 |
| (Click to enlarge) |
 |
| My first stripe! (Click to enlarge) |
 |
| (Click to enlarge) |
 |
| (Click to enlarge) |
For the time being, I promise I will temporarily avoid all cats.
 |
| (Click to enlarge) |
 |
| (Click to enlarge) |
Ya'll stay sweet!
Agape,
CC
No comments:
Post a Comment